Categories
Tags
-
#ipad cases
#Stool Chair
#tx
#Bad Credit Car Loans
#Money exchange in Mississauga
#downsizing your home for retirement
#Apple Watch Ultra bands
#California debt collection lawyer
#product photographer in NYC
#Tesla Model Y mods
#Lawyers for identity theft
#Apple Watch bands 44mm
#downsizing for seniors
#single malt whiskeys
#AC repair in San Antonio
#AC repair in Boerne
#identity theft attorneys in NJ
#decluttering home
#Tree of Life tapestry
#leather couches for sale
#Glenfiddich 18
#ADA website accessibility
#Asphalt Shingle Repair
#Oxford Tower Business Bay Dubai
#car hood LED strip
#plastic parts crystal coating
#Recliner Sofas
#25mm Ear Gauges
#selling furniture at auction
#HVAC repair in San Antonio
#Barrel Bourbon Whiskey
#leather seat covers for cars
#car umbrella shade
#Pure sine wave inverters
#AC and heating repair near you
#New Year's Eve party food ideas
#medieval unicorn tapestry
#apply for car loan
#Geek Bar Pulse 25000 Puffs Disposable
#holistic substance abuse treatment
#alcohol rehab centers
#Soft Mattresses
#Gift Tooth Fairy Toys
#tooth fairy toy
#breakfast platter
#vehicle loans in BC
#loan car calculator
#quiet generators
#Los Angeles knee injury lawyer
#wall-hanging tapestries
#tapestry wall hangings
#fitness coach Leichhardt
#product photography studio
#Corporate shuttle services
#roof claim lawyer
#propane electric generator
#Custom Spare Tire Covers
#Al Fakher Crown Bar
#Geek Bar Pulse 15000
Archives
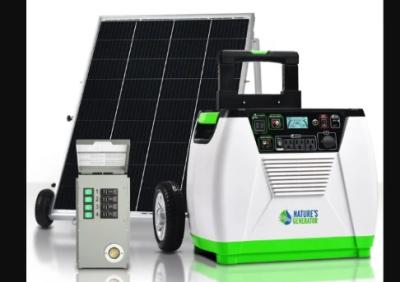
How to Install a Pure Sine Wave Inverter in Your Solar Setup
-
When building a reliable off-grid or backup solar energy system, choosing the right inverter is just as critical as selecting your solar panels or batteries. Pure sine wave inverters are widely preferred in residential and mobile solar installations because they produce clean, stable electricity that mimics the power you get from the grid. If you're planning to install one in your solar setup, understanding the step-by-step process can save you time, money, and potential system errors.
Unlike modified sine wave inverters, pure sine wave units can safely power sensitive electronics like laptops, televisions, and newer appliances without causing interference or overheating. Their smooth waveform output ensures efficient operation of inductive loads such as refrigerators, power tools, and medical devices.
Step 1: Select the Right Inverter for Your Needs
Before you begin installation, make sure the inverter matches the total power requirements of your system. This involves calculating the total wattage of all appliances you intend to run simultaneously. Add a safety margin of 20–30% to this number to prevent overload.
Also, verify that the inverter’s voltage matches your battery bank (usually 12V, 24V, or 48V) and that the unit includes sufficient surge capacity for high-startup appliances like pumps or compressors.
Step 2: Gather Required Tools and Components
Here are the items you’ll typically need for a safe and proper installation:
-
The pure sine wave inverter
-
A solar charge controller (if not integrated)
-
Deep-cycle batteries or a battery bank
-
Battery cables (appropriately gauged for your system)
-
A fuse or circuit breaker between the battery and the inverter
-
Proper connectors (ring terminals, crimpers, etc.)
-
Ventilated, weather-protected mounting location
Safety gear is also essential. Wear gloves and eye protection, and keep a fire extinguisher nearby.
Step 3: Mount the Inverter
Choose a cool, dry, and well-ventilated area to mount the inverter. It should be as close to the battery bank as possible (but not inside the same enclosure) to minimize voltage drop.
Use screws or brackets provided by the manufacturer to mount the unit on a stable surface like plywood or a steel frame. Avoid installing the inverter near flammable materials or in extremely humid environments.
Step 4: Connect the Battery Bank
Shut off all system components before making connections. Begin by attaching the battery cables to the inverter’s input terminals—usually labeled as positive (+) and negative (−). Then, connect the other ends of the cables to your deep-cycle battery bank, ensuring tight, secure connections.
Always install a fuse or circuit breaker between the battery and the inverter to protect the system from short circuits or overloads. The fuse should be rated slightly above the maximum current your inverter draws.
Step 5: Wire the AC Output
After the DC connections are secure, wire the inverter’s AC output to your household outlets or breaker panel. Many inverters have built-in GFCI outlets for plug-and-play applications. If you're wiring to a subpanel, use an automatic transfer switch to isolate the solar power from the grid, which is required in grid-tied applications.
At this point, you can also connect optional monitoring accessories or remote controls if included.
Step 6: Test the System
Double-check all wiring, connections, and voltage levels. Turn on the inverter and slowly begin to power up connected appliances. Monitor the inverter display (if available) for output voltage, load percentage, and battery level.
Start with small loads, and gradually increase usage to test how your inverter handles surge and steady-state loads. If the unit trips, check fuse ratings and cable size.
Step 7: Routine Maintenance
After installation, periodic maintenance will help extend the life of your inverter. Clean air vents regularly, inspect wiring for wear, and monitor battery health. Many systems now come with Bluetooth or Wi-Fi monitoring tools that let you track performance metrics on your phone.
Consider Backup Power Compatibility
While pure sine wave inverters are ideal for day-to-day solar operations, it’s wise to prepare for days with low solar production. A battery-operated generator can serve as a reliable secondary power source to recharge batteries or run critical loads. Make sure any backup system you integrate is compatible with your inverter and charge controller.
Conclusion
Installing pure sine wave inverters in your solar energy system ensures smooth, reliable power delivery to all your essential appliances. From selection and mounting to wiring and testing, each step must be carefully followed to ensure optimal performance and system longevity.
While upfront planning and proper installation take effort, the benefits—clean power, device safety, and energy independence—are well worth it. For those living off-grid, in RVs, or simply seeking backup solutions during outages, pure sine wave inverters are a cornerstone of modern energy resilience.
As solar usage expands, integrating energy-efficient and compatible components like inverters and battery-operated generator solutions will ensure your setup remains future-ready and dependable in any situation.
-