Categories
Tags
-
#uk
#Mistakes
#Small Business
#Sublimation Transfer Printing suppliers
#how to
# Business
#Ceramic Mugs
##Custom printing
#DTF printing
#t-shirt printing
#DTF
##Printing
#DOORMAT
#diy
#Dye Sublimation Paper
#Custom T-Shirts
#sublimation
#UK sellers
##leather
#Heat Transfer Vinyls
##SmallBusiness
##PolymerProduction
#heat press
#Mugs and Cups
#Coffee Mug
#vinyl
#UKBusinesses
#Heat Transfer
#clam heat press
#heat press 15x15
#EtsySeller
#sublimation blanks
#hustle
#Heat Press Machine
#Sublimation Printing
#Automatic
#How to remove HTV
#print tips
#cutter plotter
#HTV
Archives
How Experienced Sublimation Shops Test Every Job Before Starts
-
Posted by Edi Jiang Filed in Business #how to # Business #heat press #Coffee Mug #Sublimation Printing 153 views
There is a moment that catches almost every sublimation business owner at some point.
The customer has approved the artwork. The blank products are stacked beside the heat press. The printer is loaded with fresh paper, and the deadline is approaching faster than anyone would like.
Everything looks ready.
It is tempting to press "Print", run every transfer sheet through the printer, and get the order moving.
On busy days, that temptation becomes even stronger. After all, if you've printed hundreds of successful orders before, why would this one be any different?
The truth is that large production runs rarely go wrong because of one major failure. More often, they are undone by a collection of small details that nobody stopped to check. A slightly blocked nozzle, a colour profile that changed after a software update, a transfer that shifted by just a few millimetres, or a blank product from a different manufacturing batch can all turn into expensive mistakes once they are repeated dozens of times.
That is why experienced print shops rarely rely on confidence alone. They rely on a testing routine.
A proper test print is not simply about seeing whether ink transfers onto a product. It is about confirming that every stage of the production process works together exactly as expected before valuable materials and time are committed.
Stop Thinking of Test Printing as an Extra Job
Many beginners see testing as something that slows production down.
In reality, it does the opposite.
Five or ten minutes spent checking one sample can prevent hours of reprinting, wasted blanks and uncomfortable conversations with customers later.
Think about the cost of replacing fifty printed mugs compared with replacing one. Or imagine discovering that a company logo sits 15 mm too high after every transfer has already been printed.
Testing is simply the cheapest point at which a mistake can be found.
Once production begins, every unnoticed problem becomes progressively more expensive.
The businesses that consistently deliver reliable results understand this well. Testing is built into their workflow rather than squeezed in when they happen to have spare time.
Start Long Before the Printer Produces Anything
One of the biggest misconceptions is that testing begins when the printer starts printing.
In reality, successful testing starts with preparation.
Many production issues can be identified before a single drop of ink reaches the transfer paper.
Confirm You're Working with the Correct Artwork
This sounds obvious, yet it causes countless unnecessary reprints.
Open the customer's approved design and compare it with the production file. Don't assume they are the same.
Take a few minutes to confirm:
- The latest version is being used.
- The correct dimensions have been exported.
- Resolution is suitable for printing.
- Fonts have been embedded or converted correctly.
- Images remain sharp after resizing.
If multiple people work in the business, establish a habit of naming approved files clearly instead of relying on folders full of versions like "Final", "Final New", or "Final Latest".
Confusion over artwork versions is surprisingly common during busy periods.
Run a Nozzle Check Every Time
Many operators only perform a nozzle check when they notice poor print quality.
That approach is backwards.
A nozzle check should happen before production starts, not after problems appear.
Print the nozzle test pattern and inspect every colour carefully.
You're looking for complete, uninterrupted lines across every channel.
Even tiny gaps matter.
Missing nozzles may not seem noticeable on a colourful design, but they often become obvious in smooth gradients, skin tones or large blocks of colour.
If the pattern isn't perfect, clean the printhead and repeat the test until it is.
Starting production with an imperfect nozzle check is gambling with the entire order.
Check Ink Levels Properly
A glance at the printer isn't enough.
Confirm that every colour has sufficient ink to complete the whole production run.
Running out of one colour halfway through an order creates unnecessary inconsistency between the first and second half of the batch.
If you're using bulk ink systems, also look for air bubbles or signs that ink is not flowing normally.
Small issues are much easier to solve before printing begins.
Review Printer Settings Instead of Assuming They're Correct
Many experienced operators have learned this lesson the hard way.
The printer settings that worked yesterday are not guaranteed to be the settings being used today.
Before printing, confirm:
The correct media type has been selected.
The intended ICC colour profile is active.
Print quality settings match the job requirements.
Mirroring has been applied if your workflow requires it.
It only takes one accidental software change to produce an entire stack of unusable transfers.
Inspect the Blank Products Like a Customer Would
Once the printer has been checked, attention should shift to the blanks themselves.
Many people become so focused on colours and heat settings that they forget the product is equally important.
A transfer cannot fix a damaged blank.
Examine Every Batch Before Printing
Don't assume products arriving from the supplier are identical to the previous shipment.
Take several items from different parts of the box and inspect them under good lighting.
For garments, look for uneven stitching, marks, loose threads or visible defects.
For hard substrates, check for scratches, chips, coating damage or inconsistent finishes.
Spotting one defective product early often helps identify an issue affecting the whole batch.
Verify Sizes and Quantities
Large orders often involve multiple garment sizes.
Lay several products beside each other and confirm labels match the production schedule.
Printing an XL design onto a medium-sized shirt because two boxes were mixed is an expensive mistake that is surprisingly easy to make when production becomes busy.
Why One Sample Should Always Come First
One of the quickest ways to increase waste is printing every transfer before testing a finished product.
The argument usually sounds reasonable.
"If the artwork is approved, why not save time by printing everything together?"
Because approval on a computer screen is only one part of the process.
Heat, pressure, fabric, coating quality and printer performance all influence the final result.
A single completed sample tells you far more than a stack of unpressed transfer sheets ever will.
Treat the first sample as a full rehearsal for the production run.
Everything should be identical to the final order.
The same blank.
The same transfer paper.
The same printer settings.
The same heat press.
The same operator, if possible.
The closer your sample reflects actual production conditions, the more valuable the information it provides.
Examine the Printed Transfer Before It Reaches the Heat Press
Many operators don't inspect transfer paper closely enough.
They assume any problems will become visible after pressing.
By then, valuable products may already have been wasted.
Hold the printed transfer under bright lighting and inspect it carefully.
Look for horizontal lines that indicate banding.
Check whether solid colours appear consistent from edge to edge.
Pay attention to small text, as this often exposes printing issues first.
Fine details should appear crisp and fully defined rather than soft or incomplete.
Compare colours with previous successful jobs whenever possible.
Don't expect transfer paper to look identical to the finished product because sublimation colours develop during pressing.
However, obvious colour inconsistencies usually deserve further investigation before continuing.
Testing T-Shirts Properly Means Looking Beyond the Graphic
Once the transfer has been applied, resist the temptation to make a decision immediately.
Instead, inspect the garment methodically.
Begin by checking the overall position.
Measure rather than estimate.
The distance from the collar should match your production standard.
The design should sit centrally unless the customer requested otherwise.
If multiple garment sizes are included in the order, consider whether the design proportions remain visually balanced across each size.
Next, move closer and examine image quality.
Small imperfections often hide inside large graphics.
Look carefully at fine outlines, narrow lettering and detailed logos.
These elements usually reveal temperature or pressure issues before larger areas do.
Gradients deserve particular attention.
Smooth colour transitions should appear even rather than patchy.
If skin tones or photographic images are involved, inspect them under natural light as well as indoor lighting.
Colours can appear surprisingly different depending on where they are viewed.
Finally, put the garment aside.
Do not make your final judgment while it is still warm.
Allow it to cool naturally before inspecting it again.
Many experienced production teams deliberately leave the sample untouched for several minutes before returning to it with fresh eyes.
Cooling often reveals subtle issues that were easy to miss immediately after pressing.
Testing Sublimation Mugs Requires a Different Mindset
At first glance, mugs seem much easier to test than garments.
There is no concern about shirt sizes, fabric stretching or design placement across different body shapes. A mug is rigid, uniform and appears far more predictable.
That assumption catches many new sublimation businesses off guard.
Printing onto a curved surface introduces challenges that simply do not exist when working with flat products. A design that looks perfectly centred on your computer can suddenly appear uneven once it wraps around a mug. Small movements during pressing become far more noticeable, and tiny alignment errors that would barely be seen on a T-shirt can completely change the appearance of a finished mug.
For that reason, mug testing deserves its own routine rather than being treated as a quicker version of garment testing.
Print One Mug Exactly as the Customer Will Receive It
Just as with apparel, never rush into printing an entire batch.
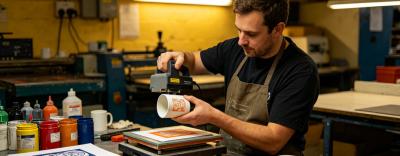
Complete one mug from start to finish using the same process you intend to use for the production order.
Avoid using an old practice mug or a blank from another supplier simply because it happens to be nearby.
Even mugs that look almost identical can have different coatings, slightly different dimensions or varying levels of heat retention. These differences influence colour reproduction and image sharpness more than many people realise.
Your sample should represent the actual order as closely as possible.
That is the only way to know whether your production settings are truly suitable.
Check the Printed Transfer Before Wrapping the Mug
Many alignment problems begin before the transfer paper even touches the mug.
Lay the printed transfer flat on your workbench and take a careful look.
Confirm that the overall width matches your template.
Measure the distance from the top and bottom edges if your design requires equal spacing.
If the artwork includes logos on both sides or text that should sit opposite the handle, check those measurements before applying any tape.
It only takes a minute, yet it can save an entire production run.
Remember that once the transfer has been attached, your opportunity to correct positioning becomes much more limited.
Wrap the Transfer Carefully Instead of Quickly
This is one stage where patience pays for itself.
Wrap the transfer around the mug slowly and keep steady tension across the entire surface.
The paper should lie flat without wrinkles or loose sections.
Pay particular attention to the seam where both ends meet.
If one side overlaps or pulls away slightly, the finished design may no longer appear symmetrical.
Before securing the transfer, rotate the mug in your hands and look at it from different angles.
Ask yourself a few simple questions.
Does the artwork appear level?
Is the distance from the handle consistent?
Does the design sit at the height you intended?
Making these checks now is far easier than discovering a crooked logo after pressing.
Prevent Movement During Pressing
Ghosting remains one of the most common issues in sublimation mug printing.
It occurs when the transfer shifts even slightly while the ink is turning into gas.
The result is often a faint duplicate image or blurred edges around text and graphics.
Fortunately, preventing ghosting is usually straightforward.
Use heat-resistant tape generously enough to hold the transfer firmly in place.
Do not rely on one small strip if the design wraps around most of the mug.
After taping, gently try to move the transfer with your fingers.
If you can feel any movement at all, add more tape before placing the mug into the press.
Those extra few seconds are usually far less costly than replacing finished products.
Inspect More Than the Front of the Mug
Many people instinctively examine only the side that faces the customer on a website photograph.
Real customers do not do that.
They pick up a mug, rotate it and look at every surface.
Your inspection should follow the same habit.
Check the area closest to the handle, as this is often where pressure becomes less even.
Look at the top and bottom edges to ensure colours remain consistent right to the margins.
Examine solid colour areas for patchiness.
Inspect fine lettering for sharpness.
Hold the mug under different lighting conditions to see whether colours remain consistent from every angle.
A mug that looks excellent from the front but poor around the handle still counts as a failed sample.
Let the Mug Cool Before Making Any Decisions
One mistake that appears surprisingly often is judging the result while the mug is still hot.
Freshly pressed mugs can be misleading.
Colours continue to stabilise as the mug cools, and the surface becomes easier to inspect once it is comfortable to handle.
Leave the sample for several minutes before carrying out your final inspection.
This small pause encourages a more objective assessment and reduces the temptation to rush into production simply because everything appears acceptable at first glance.
When Something Looks Wrong, Resist the Urge to Change Everything
Testing is only useful if it helps you identify the real cause of a problem.
Unfortunately, many operators make troubleshooting much harder than it needs to be.
Imagine your sample comes out darker than expected.
Instead of changing one setting, they immediately reduce the temperature, shorten the pressing time, adjust the colour profile and increase print quality all at once.
If the second sample improves, there is no way of knowing which adjustment actually solved the issue.
A better approach is much more disciplined.
Change one variable at a time.
If the colour appears too dark, begin by reviewing the colour management settings before altering the heat press temperatures.
If edges look blurry, investigate movement before changing pressure.
If colours appear dull, confirm the blank coating and transfer quality before assuming the printer is at fault.
Working systematically may feel slower initially, but it almost always reaches the correct solution faster.
Build a Repeatable Testing Routine Instead of Relying on Experience
Many experienced sublimation operators seem to notice problems almost instinctively.
In reality, most of them are not relying on memory at all.
They are following the same routine every time.
Creating a simple pre-production workflow keeps quality consistent regardless of who is operating the equipment.
Begin by confirming the approved artwork and production specifications.
Inspect the printer and complete a nozzle check.
Verify heat press settings using an independent thermometer if necessary, rather than relying solely on the machine's display.
Check the blanks for defects before printing.
Produce one complete sample using actual production materials.
Inspect the finished product carefully after cooling.
Only once every stage has been approved should the full production run begin.
Following the same sequence on every order removes unnecessary guesswork and greatly reduces the chance of overlooking small details during busy periods.
It also makes training new staff significantly easier, as they are learning a proven process rather than depending on individual judgment.
Consistency Is What Makes Large Orders Profitable
Most successful sublimation businesses eventually discover that profitability is not determined by how quickly products can be printed.
It comes from producing the same high standard repeatedly with as little waste as possible.
Testing plays a central role in achieving that consistency.
Every sample provides an opportunity to confirm colours, positioning, image quality and equipment performance before materials are consumed on a larger scale.
It transforms production from a process based on assumptions into one based on evidence.
Customers rarely know how much preparation goes into a well-made sublimation product. They simply expect every item in their order to look the same, whether they ordered five pieces or five hundred.
Meeting that expectation starts long before the main production run begins.
The next time a large order lands on your workbench, and you're tempted to save a few minutes by skipping the sample, remember what is really at stake. A single test print costs very little. Reprinting an entire order costs far more than paper, ink and blank products. It also consumes valuable production time, delays deliveries and risks damaging customer confidence.
The most reliable sublimation workshops are not necessarily those with the newest equipment or the fastest printers. More often, they are the ones who refuse to leave quality to chance. They test carefully, adjust methodically and only begin full production when the sample proves that every part of the workflow is working exactly as intended.